How do I add a image or gif to a moving green screen?

idk wrote on 6/17/2018, 1:16 AM

(there's also a second question)

I really don't know if this question is for sony vegas pro or something else. I don't know what kind of plugins to use. I want to put a image on a green screen that moves, but I don't know how.

I also don't know how to make something visible and hiding the image I used for the green screen (for example: )
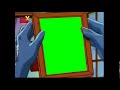
I'm really not that used to green screens, so please help.

Comments

fr0sty wrote on 6/17/2018, 2:08 AM

Corner pin motion tracking is what you are after. There are a few plugins that do it, but Mocha is the best.

Systems:

Desktop

AMD Ryzen 7 1800x 8 core 16 thread at stock speed

64GB 3000mhz DDR4

Geforce RTX 3090

Windows 10

Laptop:

ASUS Zenbook Pro Duo 32GB (9980HK CPU, RTX 2060 GPU, dual 4K touch screens, main one OLED HDR)

Dexcon wrote on 6/17/2018, 2:21 AM

To replace a green screen with another image, you would use chroma-keying, and Vegas Pro has a chroma-keyer in Video FX.

There are a lot of tutorials on YouTube about chroma-keying in Vegas Pro - just go to YouTube and search 'chroma key Vegas Pro' or the like.

For the green screen image you have posted above, the green screen doesn't move; therefore, all you'll need to do is use pan/crop on the inserted image to frame it to your liking in the green screen space.

If the green screen image is moving and you want the inserted image to move precisely with the moving green screen, you are entering the world of tracking. Note: if the movement of the green screen is very simple, you might get an acceptable result by key framing a matching movement of the inserted image in the image's pan/crop settings.

Where tracking is needed, you will need a plug-in such as Mocha Pro (very expensive), or a separate programme such as HitFilm (purchase required) or HitFilm Express (free) with the Mocha HitFilm Add-on Pack ($49.99), or Fusion within Blackmagic Design's DaVinci Resolve (free but with a huge learning curve), or After Effects with a Mocha plug-in (now only available by subscription unless you have access to an older version that has a perpetual licence).

Cameras: Sony FDR-AX100E; GoPro Hero 11 Black Creator Edition

Installed: Vegas Pro 15, 16, 17, 18, 19, 20, 21 & 22, HitFilm Pro 2021.3, DaVinci Resolve Studio 20, BCC 2025, Mocha Pro 2025.0, NBFX TotalFX 7, Neat NR, DVD Architect 6.0, MAGIX Travel Maps, Sound Forge Pro 16, SpectraLayers Pro 11, iZotope RX11 Advanced and many other iZ plugins, Vegasaur 4.0

Windows 11

Dell Alienware Aurora 11:

10th Gen Intel i9 10900KF - 10 cores (20 threads) - 3.7 to 5.3 GHz

NVIDIA GeForce RTX 2080 SUPER 8GB GDDR6 - liquid cooled

64GB RAM - Dual Channel HyperX FURY DDR4 XMP at 3200MHz

C drive: 2TB Samsung 990 PCIe 4.0 NVMe M.2 PCIe SSD

D: drive: 4TB Samsung 870 SATA SSD (used for media for editing current projects)

E: drive: 2TB Samsung 870 SATA SSD

F: drive: 6TB WD 7200 rpm Black HDD 3.5"

Dell Ultrasharp 32" 4K Color Calibrated Monitor


LAPTOP:

Dell Inspiron 5310 EVO 13.3"

i5-11320H CPU

C Drive: 1TB Corsair Gen4 NVMe M.2 2230 SSD (upgraded from the original 500 GB SSD)

Monitor is 2560 x 1600 @ 60 Hz

Kinvermark wrote on 6/17/2018, 5:36 AM

Well normally you use a green screen for easy background removal of a subject so you can place the subject in another background.  This seems to be the reverse here (if I understand your example correctly). That being the case you don't need a chroma key  just mask or use a PIP effect to place a "photo" in the frame.

Dexcon wrote on 6/17/2018, 5:51 AM

just mask or use a PIP effect to place a "photo" in the frame

Maybe I'm missing something here, but wouldn't a PIP chop off the right hand that moves in and swipes up and down a couple of times over the green screen?


Cameras: Sony FDR-AX100E; GoPro Hero 11 Black Creator Edition

Installed: Vegas Pro 15, 16, 17, 18, 19, 20, 21 & 22, HitFilm Pro 2021.3, DaVinci Resolve Studio 20, BCC 2025, Mocha Pro 2025.0, NBFX TotalFX 7, Neat NR, DVD Architect 6.0, MAGIX Travel Maps, Sound Forge Pro 16, SpectraLayers Pro 11, iZotope RX11 Advanced and many other iZ plugins, Vegasaur 4.0

Windows 11

Dell Alienware Aurora 11:

10th Gen Intel i9 10900KF - 10 cores (20 threads) - 3.7 to 5.3 GHz

NVIDIA GeForce RTX 2080 SUPER 8GB GDDR6 - liquid cooled

64GB RAM - Dual Channel HyperX FURY DDR4 XMP at 3200MHz

C drive: 2TB Samsung 990 PCIe 4.0 NVMe M.2 PCIe SSD

D: drive: 4TB Samsung 870 SATA SSD (used for media for editing current projects)

E: drive: 2TB Samsung 870 SATA SSD

F: drive: 6TB WD 7200 rpm Black HDD 3.5"

Dell Ultrasharp 32" 4K Color Calibrated Monitor


LAPTOP:

Dell Inspiron 5310 EVO 13.3"

i5-11320H CPU

C Drive: 1TB Corsair Gen4 NVMe M.2 2230 SSD (upgraded from the original 500 GB SSD)

Monitor is 2560 x 1600 @ 60 Hz

Kinvermark wrote on 6/17/2018, 5:59 AM

Sorry, you're right, needs to be chromakeyed out - it's 4 AM here :)

idk wrote on 6/17/2018, 10:44 AM

Corner pin motion tracking is what you are after. There are a few plugins that do it, but Mocha is the best.

there's a bunch of options in mocha.

Isn't that better with after effects?

Kinvermark wrote on 6/17/2018, 10:58 AM

But the green square doesn't move, so why does it need motion tracking?

Red Prince wrote on 6/17/2018, 11:15 AM

But the green square doesn't move, so why does it need motion tracking?

That’s what puzzles me about this thread, too. All it needs is chromakey, which is included in Vegas. Plus it is an animation, so there is no need for despilling or any other advanced processing, just a very basic chromakey.

Just put the GIF on the track below the track that contains the video and add a chromakey, the green variety, to the video. That’s it.

He who knows does not speak; he who speaks does not know.
                    — Lao Tze in Tao Te Ching

Can you imagine the silence if everyone only said what he knows?
                    — Karel Čapek (The guy who gave us the word “robot” in R.U.R.)

idk wrote on 6/17/2018, 11:27 AM

To replace a green screen with another image, you would use chroma-keying, and Vegas Pro has a chroma-keyer in Video FX.

There are a lot of tutorials on YouTube about chroma-keying in Vegas Pro - just go to YouTube and search 'chroma key Vegas Pro' or the like.

For the green screen image you have posted above, the green screen doesn't move; therefore, all you'll need to do is use pan/crop on the inserted image to frame it to your liking in the green screen space.

If the green screen image is moving and you want the inserted image to move precisely with the moving green screen, you are entering the world of tracking. Note: if the movement of the green screen is very simple, you might get an acceptable result by key framing a matching movement of the inserted image in the image's pan/crop settings.

Where tracking is needed, you will need a plug-in such as Mocha Pro (very expensive), or a separate programme such as HitFilm (purchase required) or HitFilm Express (free) with the Mocha HitFilm Add-on Pack ($49.99), or Fusion within Blackmagic Design's DaVinci Resolve (free but with a huge learning curve), or After Effects with a Mocha plug-in (now only available by subscription unless you have access to an older version that has a perpetual licence).

I do know how to put an image on a green screen that doesn't move. But I don't know how to track a moving green screen

I won't be paying any money because I literally don't have money, and there's probably no solution but to use after effects.

For all of you people that are confused, I want to put an image to a moving and going on different sides kind of green screen, I know how to put an image on a non-moving green screen.

Tim L wrote on 6/17/2018, 11:52 AM

Ignite Express from HitFilm matches your budget.

https://fxhome.com/ignite-express

It is a FREE suite of plug-ins (works in Vegas & Movie Studio) from fxHome, the makers of HitFilm (which was mentioned earlier). There is an effect called "Quad Warp" which will let you stretch the four corners of your insert video in any way you want. I would try putting your insert video on an upper track first and lowering the opacity temporarily, then stepping through your footage and setting the corners where you need them. Then move your video to a track below the green screen track, set the opacity back to 100%, and enable the chromakey fx on your green screen track. Ignite Express also includes a free green screen / chromakey function that is supposed to be very good -- probably better than the one built into Vegas. But I haven't tried it myself.

idk wrote on 6/17/2018, 4:08 PM

Ignite Express from HitFilm matches your budget.

https://fxhome.com/ignite-express

It is a FREE suite of plug-ins (works in Vegas & Movie Studio) from fxHome, the makers of HitFilm (which was mentioned earlier). There is an effect called "Quad Warp" which will let you stretch the four corners of your insert video in any way you want. I would try putting your insert video on an upper track first and lowering the opacity temporarily, then stepping through your footage and setting the corners where you need them. Then move your video to a track below the green screen track, set the opacity back to 100%, and enable the chromakey fx on your green screen track. Ignite Express also includes a free green screen / chromakey function that is supposed to be very good -- probably better than the one built into Vegas. But I haven't tried it myself.

Looks trustable, probably won't be able to it right but thanks.

idk wrote on 6/17/2018, 4:37 PM

Corner pin motion tracking is what you are after. There are a few plugins that do it, but Mocha is the best.

Few plugins, what kind of plugins?

fr0sty wrote on 6/17/2018, 5:30 PM

Mocha, Hitfilm both have plugins for Vegas that do motion tracking. I've only used Mocha, it does planar tracking which is extremely accurate. You can do far more than this with it, such as isolating a person in a scene to do color correction on just them, even as they move through the scene, removing elements from a scene, tracking CGI animated elements into the scene when compositing, and more.

Last changed by fr0sty on 6/17/2018, 5:32 PM, changed a total of 1 times.

Systems:

Desktop

AMD Ryzen 7 1800x 8 core 16 thread at stock speed

64GB 3000mhz DDR4

Geforce RTX 3090

Windows 10

Laptop:

ASUS Zenbook Pro Duo 32GB (9980HK CPU, RTX 2060 GPU, dual 4K touch screens, main one OLED HDR)

fr0sty wrote on 6/17/2018, 5:33 PM

Systems:

Desktop

AMD Ryzen 7 1800x 8 core 16 thread at stock speed

64GB 3000mhz DDR4

Geforce RTX 3090

Windows 10

Laptop:

ASUS Zenbook Pro Duo 32GB (9980HK CPU, RTX 2060 GPU, dual 4K touch screens, main one OLED HDR)

Kinvermark wrote on 6/17/2018, 5:40 PM

[[MENTION:undefined]]

idk,

Your posts get more confusing by the hour...

You want to track a moving greenscreen, but posted a clip with a static one?

You keep asking for plug-ins, but have stated you "literally have no money." How do you plan to buy them?

You seem to want to use After Effects, but do you actually own it and know how to use it? If so, then of course use After Effects.

You were told about Hitfilm (both ignite express and Hitfilm express are free) but seem to have dismissed it without trying.

And, this sentence:

I want to put an image to a moving and going on different sides kind of green screen,

makes no sense to me. Is this a google translation from another language?


idk wrote on 6/17/2018, 10:02 PM

[[MENTION:undefined]]

idk,

Your posts get more confusing by the hour...

You want to track a moving greenscreen, but posted a clip with a static one?

You keep asking for plug-ins, but have stated you "literally have no money." How do you plan to buy them?

You seem to want to use After Effects, but do you actually own it and know how to use it? If so, then of course use After Effects.

You were told about Hitfilm (both ignite express and Hitfilm express are free) but seem to have dismissed it without trying.

And, this sentence:

I want to put an image to a moving and going on different sides kind of green screen,

makes no sense to me. Is this a google translation from another language?


forget it, i might as well use hitflim even know there's literally no tutorials out there.

i really don't know if i told you that there are two questions, i also forgot to mention that i couldn't fit 2 questions on the title.

thanks, i guess.


Dexcon wrote on 6/17/2018, 11:06 PM

i might as well use hitflim even know there's literally no tutorials out there

Not so! The HitFilm web site has dozens upon dozens of tutorials, including several on tracking using Mocha in HitFilm. See: http://fxhome.com/video-tutorials#/

Search 'HitFilm chroma key' on YouTube and there are lots of how-to videos on chroma-keying in HitFilm and HitFilm Express.


Cameras: Sony FDR-AX100E; GoPro Hero 11 Black Creator Edition

Installed: Vegas Pro 15, 16, 17, 18, 19, 20, 21 & 22, HitFilm Pro 2021.3, DaVinci Resolve Studio 20, BCC 2025, Mocha Pro 2025.0, NBFX TotalFX 7, Neat NR, DVD Architect 6.0, MAGIX Travel Maps, Sound Forge Pro 16, SpectraLayers Pro 11, iZotope RX11 Advanced and many other iZ plugins, Vegasaur 4.0

Windows 11

Dell Alienware Aurora 11:

10th Gen Intel i9 10900KF - 10 cores (20 threads) - 3.7 to 5.3 GHz

NVIDIA GeForce RTX 2080 SUPER 8GB GDDR6 - liquid cooled

64GB RAM - Dual Channel HyperX FURY DDR4 XMP at 3200MHz

C drive: 2TB Samsung 990 PCIe 4.0 NVMe M.2 PCIe SSD

D: drive: 4TB Samsung 870 SATA SSD (used for media for editing current projects)

E: drive: 2TB Samsung 870 SATA SSD

F: drive: 6TB WD 7200 rpm Black HDD 3.5"

Dell Ultrasharp 32" 4K Color Calibrated Monitor


LAPTOP:

Dell Inspiron 5310 EVO 13.3"

i5-11320H CPU

C Drive: 1TB Corsair Gen4 NVMe M.2 2230 SSD (upgraded from the original 500 GB SSD)

Monitor is 2560 x 1600 @ 60 Hz

Kinvermark wrote on 6/18/2018, 12:00 AM

ur welcome, i guess? 😋

Rainer wrote on 6/18/2018, 2:12 AM

Outside Vegas you could use the excellent tracker in the free version of DaVinci Resolve/ Fusion 15. Or you could track manually in pan/crop in Vegas, tedious but doable with patience and a lot of keyframes. Second question, in Chroma Keyer sync with timeline, insert keyframe one frame before where you want the image to begin to disappear, move indicator to where you want the image fully gone, move the high threshold to zero.