ACES and ACEScc are color spaces for motion picture production. They enable accurate exposure compensation and color balancing, and let you easily match between shots and cameras.
Sony Vegas Pro 12 and later have built-in support for ACES. I've built a new configuration for ACEScc, which is easier to use than ACES, and works better with standard video filters.
My ACES and ACEScc configurations have added color spaces:
* Rec.709 and Rec.709 full_range, for standard video cameras
* Sony Cine1 (HyperGamma 4)
* Sony NEX-VG20
* Panasonic GH2
* Panasonic GH4
* GoPro Protune
* Canon Log (C100/C300)
* Panasonic V-Log
With help from forum members, I can create color spaces for additional cameras.
The configurations are posted on my web site: http://www.jbalazer.com/aces-in-sony-vegas
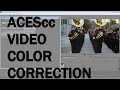
Short ACEScc demo video:
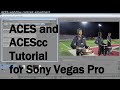
Detailed ACES and ACEScc Intro and Tutorial video:
Sony Vegas Pro 12 and later have built-in support for ACES. I've built a new configuration for ACEScc, which is easier to use than ACES, and works better with standard video filters.
My ACES and ACEScc configurations have added color spaces:
* Rec.709 and Rec.709 full_range, for standard video cameras
* Sony Cine1 (HyperGamma 4)
* Sony NEX-VG20
* Panasonic GH2
* Panasonic GH4
* GoPro Protune
* Canon Log (C100/C300)
* Panasonic V-Log
With help from forum members, I can create color spaces for additional cameras.
The configurations are posted on my web site: http://www.jbalazer.com/aces-in-sony-vegas
Short ACEScc demo video:
Detailed ACES and ACEScc Intro and Tutorial video: