Hi team,
Looking for some suggestions on how I might get out of a difficult situation.
The background info:
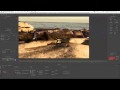
I have footage shot on a 5D Mk 2. The frame contains 30% of a graduated deep blue sky, no clouds, with talent in front. Ungraded, the sky "throbs" due to over compression (thanks 5D). The director wants a "punched" look to the scene, so I have punched the saturation and used about 6 different secondary color correctors to bring different colors up differing amounts, whilst keeping the talent normal.
The problem:
When the colors are enhanced during grading, the throbbing and compression artifacts become distractingly bad. I mean REAL bad. A little bit of grading = a LOT more obvious source compression.
The obvious solution:
Ease up on the saturation. But this would be a last resort because the original image is VERY flat due to the flat response curve used. It NEEDS grading. And the compression is still very obvious anyway.
My solution:
Misuse the Chromakeyer to key off the sky, and replace it with a better sky. I pick an average sky sample, and using "display mask only" option and the MIN/MAX and blur, I fine tune it so we have a reasonable mask. There's some bleed on the shirts, but I can superimpose an un-keyed version for the bottom half of the image, blocking out the partially keyed shirts.
Sounds good in theory!
The problem with my solution:
There's a massive color shift to green in the unkeyed parts of the image: mountains and the shirts. I have identified that both the shirts and the mountains have a predominant blue hue to them, just like the sky.
But even though I have a "reasonable" mask, the unmasked parts of the image are prone to this massive hue shift to green once the keyer is activated.
I'm guessing the chromakeyer is "enhancing" the image - it's looking for parts of the image that are ALMOST the key color, and adding an opposite (negative) hue. Probably works fine on small edges with blue screen bleed, but doesn't work at all when you're trying to abuse the keyer like I am ;-)
Any suggestions for how to clean up the sky, whilst keeping the punchy colors?
Oh, did I mention there's 2 people, both moving at different rates? A static mask won't be possible.
Cheers,
Ent
Looking for some suggestions on how I might get out of a difficult situation.
The background info:
I have footage shot on a 5D Mk 2. The frame contains 30% of a graduated deep blue sky, no clouds, with talent in front. Ungraded, the sky "throbs" due to over compression (thanks 5D). The director wants a "punched" look to the scene, so I have punched the saturation and used about 6 different secondary color correctors to bring different colors up differing amounts, whilst keeping the talent normal.
The problem:
When the colors are enhanced during grading, the throbbing and compression artifacts become distractingly bad. I mean REAL bad. A little bit of grading = a LOT more obvious source compression.
The obvious solution:
Ease up on the saturation. But this would be a last resort because the original image is VERY flat due to the flat response curve used. It NEEDS grading. And the compression is still very obvious anyway.
My solution:
Misuse the Chromakeyer to key off the sky, and replace it with a better sky. I pick an average sky sample, and using "display mask only" option and the MIN/MAX and blur, I fine tune it so we have a reasonable mask. There's some bleed on the shirts, but I can superimpose an un-keyed version for the bottom half of the image, blocking out the partially keyed shirts.
Sounds good in theory!
The problem with my solution:
There's a massive color shift to green in the unkeyed parts of the image: mountains and the shirts. I have identified that both the shirts and the mountains have a predominant blue hue to them, just like the sky.
But even though I have a "reasonable" mask, the unmasked parts of the image are prone to this massive hue shift to green once the keyer is activated.
I'm guessing the chromakeyer is "enhancing" the image - it's looking for parts of the image that are ALMOST the key color, and adding an opposite (negative) hue. Probably works fine on small edges with blue screen bleed, but doesn't work at all when you're trying to abuse the keyer like I am ;-)
Any suggestions for how to clean up the sky, whilst keeping the punchy colors?
Oh, did I mention there's 2 people, both moving at different rates? A static mask won't be possible.
Cheers,
Ent